How to Make a Dome Out of Poster Board Easy

It's easy to spend hundreds of dollars for a playhouse but if you want something really cool that your kids can brag about, then this is the playhouse for you!
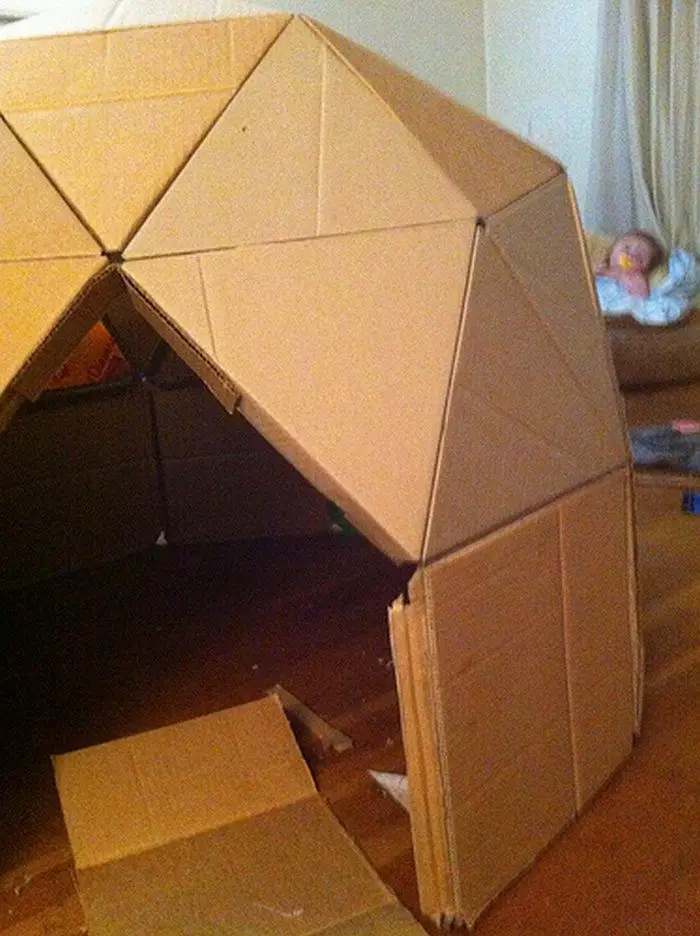
Cardboard forts and cardboard playhouses – they're not a new idea. This DIY playhouse, however, is one of the more awesome yet easy projects you can find! It's totally unique since you don't usually find a geodesic playhouse sold in toy stores. Plus it is steampunk-themed, which most kids just love. :)
Our Pick
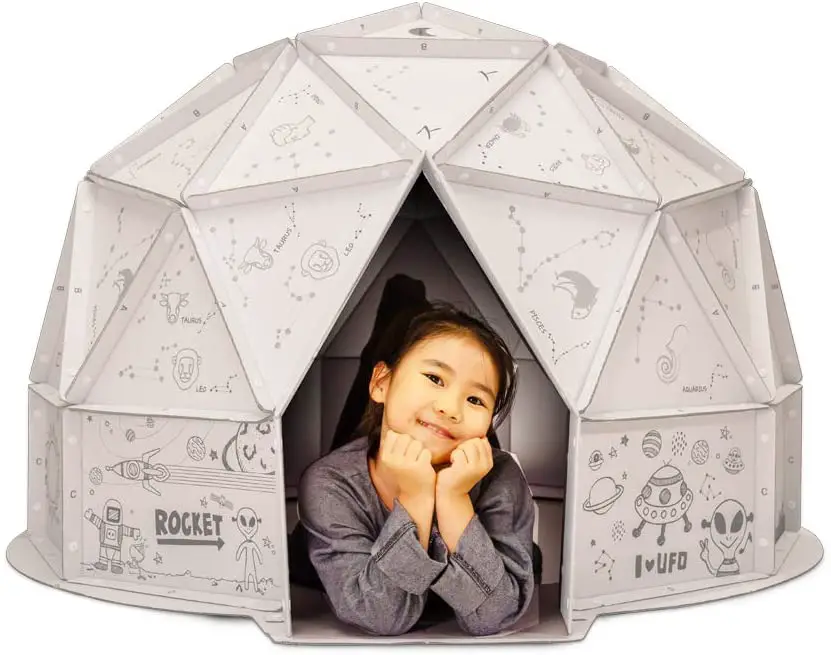
Do you have kids who you think will love this? Then gather all the materials you will need and learn how to build a geodesic cardboard play dome by reading the complete tutorial below!

What are the materials needed to build a cardboard play dome?
Materials:
- Cardboard
- White Glue
- Clear Primer Spray and Top Coat
- White Spray Paint
- Metallic Spray Paint (in two colors)
- Acrylic Paint (black and white)
- Metallic Paint (or metal powder mixed with white glue)
Tools:
- Box Cutter
- Ruler
- Pen or Pencil
- Hot Glue Gun
- Paintbrushes (large, small and round)
Click on any image to start the lightbox display. Use your Esc key to close the lightbox.
How to build a cardboard play dome?
1. Measure and cut triangles and squares
If there were no doors or windows in this dome, it would consist of
30 AAB triangles
10 BBB triangles
10 B squares
In my case, A measured 10 7/16 inches, and B measured 12 inches.
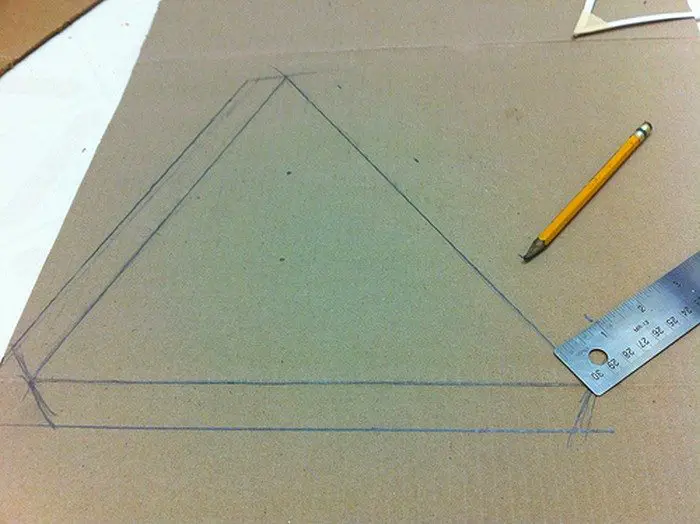
I drew 1-inch flaps outside the edges of the triangles and squares (skipping the corners, as shown) so I could attach things together on the inside of the dome.
I left out three of the BBB triangles to make two windows and the top of the door for this project, and one of the B squares. I suggest holding a ruler tightly while you slice along the outline of your shapes with a box cutter.
Remember to cut outside the flaps, not inside them along the triangle or square. It helps to cut one and use it as a guide to trace the others, then cut the rest along the pencil lines, rather than measuring every time.

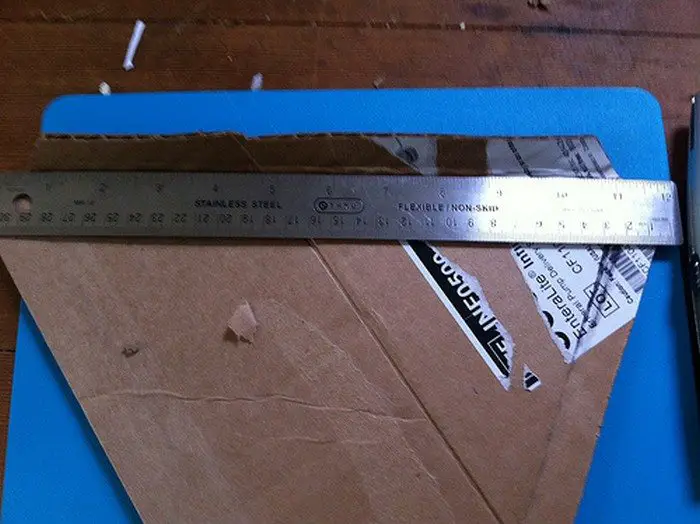
2. Fold the flaps
I made an indentation along the sides of the triangles or squares before folding.
Holding the ruler tight, I traced the edge I wanted to fold with a dull corner of the box cutter (the handle, not the blade). Then, I kept holding the ruler in place while folding the flap up, using the ruler and the indentation as a guide.
You might want to be careful while making the indentation along the grain in the cardboard; it sometimes tears the top layer a little.

I tried to put the ugly side of the cardboard (like the taped or printed side) on the inside of the dome. If I was folding flaps up, the ugly side would also be face up.
3. Glue the flaps together
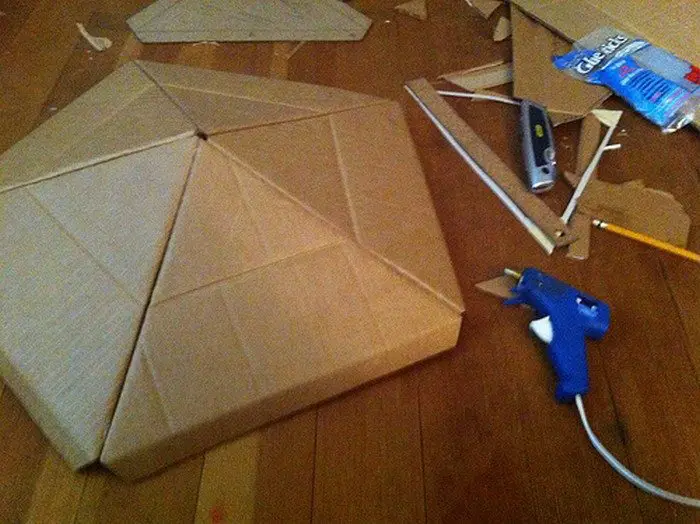
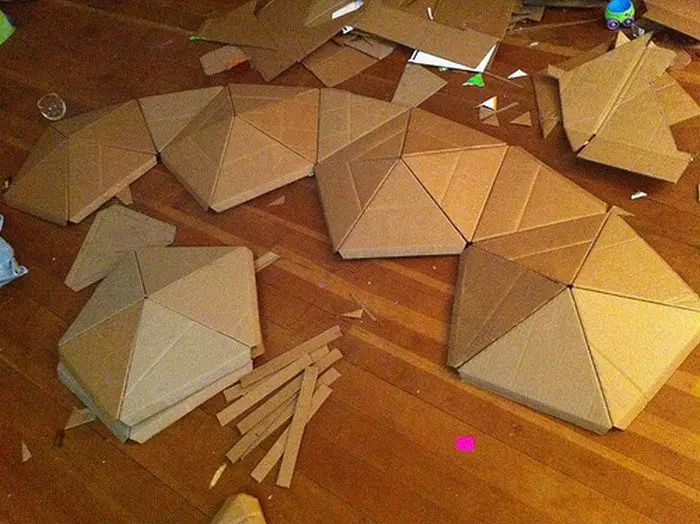
Start with the 30 AAB triangles. Taking 5 at a time, glue the short sides of them together to form a pentagon. You should end up with 6 of these pentagons. If you measured and cut right, the pentagons won't be completely flat. Be sure to keep all the flaps on one side.
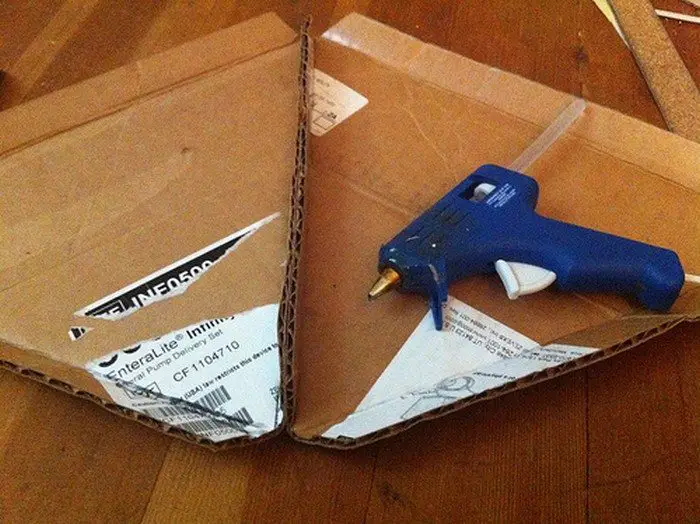
The exposed edges of the pentagons should all be the B measuring side, 12 inches in this case.
Now glue one of the BBB triangles to a side of a pentagon. Glue another pentagon to another side of that BBB triangle to end up with something like this.
Let's say the exposed edge of that BBB triangle is the bottom of this piece. Glue another BBB triangle to one of the pentagons so that its exposed edge is also at the bottom. Keep gluing pentagons alternating with BBB triangles so that one edge of each pentagon and one edge of each BBB triangle line up in a sort of gently curved bottom until you have 5 pentagons and 5 BBB triangles.
In my case, I only used 4 BBB triangles here so I could leave the top of the door open.
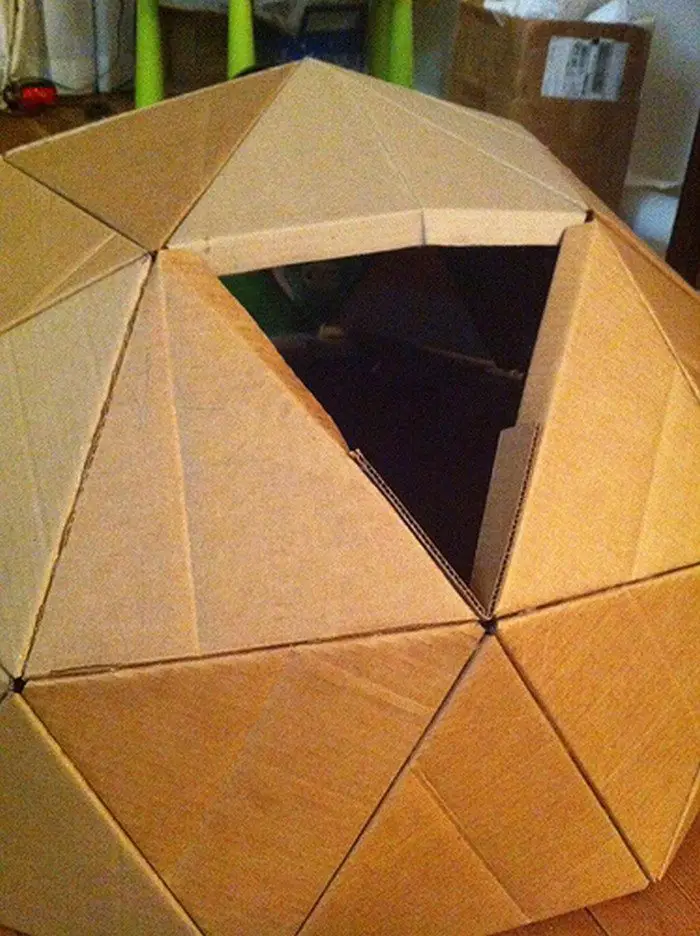
You should have 1 pentagon left and 5 BBB triangles left. I had only 3 BBB triangles left because I wanted to leave two windows in the dome.
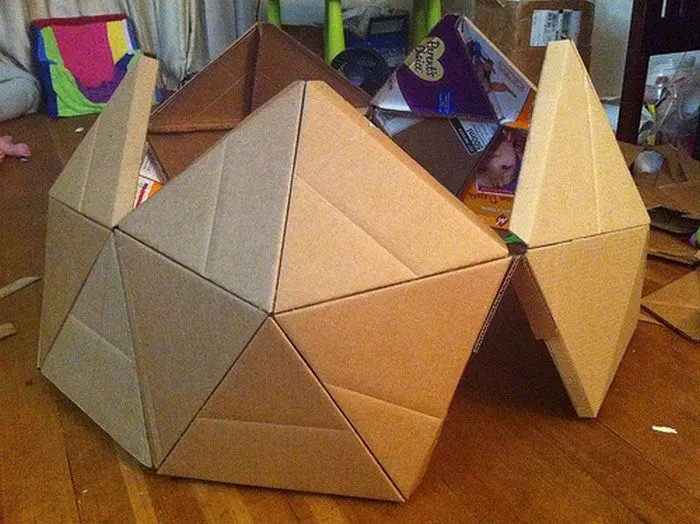
Stand the line of glued pentagons and triangles up so that the bottom is resting on the floor. Bring the ends together to form a circle. In my picture, the open triangle is at the top of the door.
You might decide not to leave an open triangle. Notice that instead of seeing pentagons in this structure, you could see hexagons with one top piece missing.
Glue the BBB triangles, and point down, into these spaces.
Now there should be an open pentagon shape at the top, ready for you to glue in your last cardboard pentagon.
I'm really sorry for not having pictures of that part; it seems that Lilith got into my photos and deleted some when I thought she was simply playing Tozzle on my iPhone.
Now glue a square along the edge of each exposed triangle edge at the bottom of the dome. This will raise its B unites above the ground, 12 inches in this case. Glue the sides of the B squares to each other where they touch. Once again, make sure to keep all the flaps on the same side. Some people keep them on the outside, but I wanted mine on the inside. Whichever you choose, be consistent.
Continued Page 2…
Source: https://craft.ideas2live4.com/2016/01/21/how-to-make-a-cardboard-play-dome/
0 Response to "How to Make a Dome Out of Poster Board Easy"
Postar um comentário